Convert Any Frame to Video: A Smarter Way to Create AI Videos
If you’ve ever tried to generate a video with AI and ended up with results that look nothing like what you had in mind, you’re not alone. Most AI video tools work like a black box - you type a prompt, hit generate, and hope for the best. The output might be visually interesting, but it rarely matches your creative vision precisely.
That’s exactly why a new approach is gaining traction among creators: converting specific frames directly into video. When you can control which images appear when in a video, the whole process shifts from guesswork to intention. This post from Dzine AI walks you through how to convert any frame to video - and why doing it on Dzine makes it easier than ever.
What Is “Any Frame to Video”?
Any Frame to Video is a video generation method where you upload multiple still images and place each one at a specific point on a video timeline. Instead of relying purely on a text prompt to drive the visuals, you’re giving the AI concrete reference points - keyframes - and asking it to fill in the transitions between them.
Think of it like animation storyboarding, but powered by AI. You decide which image should appear at second 0, which at second 3, and which at the end. The model then generates smooth, natural transitions between those anchor points, producing a cohesive video that actually reflects your intent.
This is fundamentally different from standard image-to-video or text-to-video generation. Instead of one starting frame and a prompt, you get a multi-point structure. The result is a video where the content, pacing, and visual flow are largely under your control - not the model’s.
How to Convert Any Frame to Video on Dzine
Dzine is an all-in-one AI image and video generator. Except for the any frame to video, it also allows you to convert refernce images to video and convert start/end frames to vidoe. Here’s how to convert image sequence to video using the Any Frame mode:

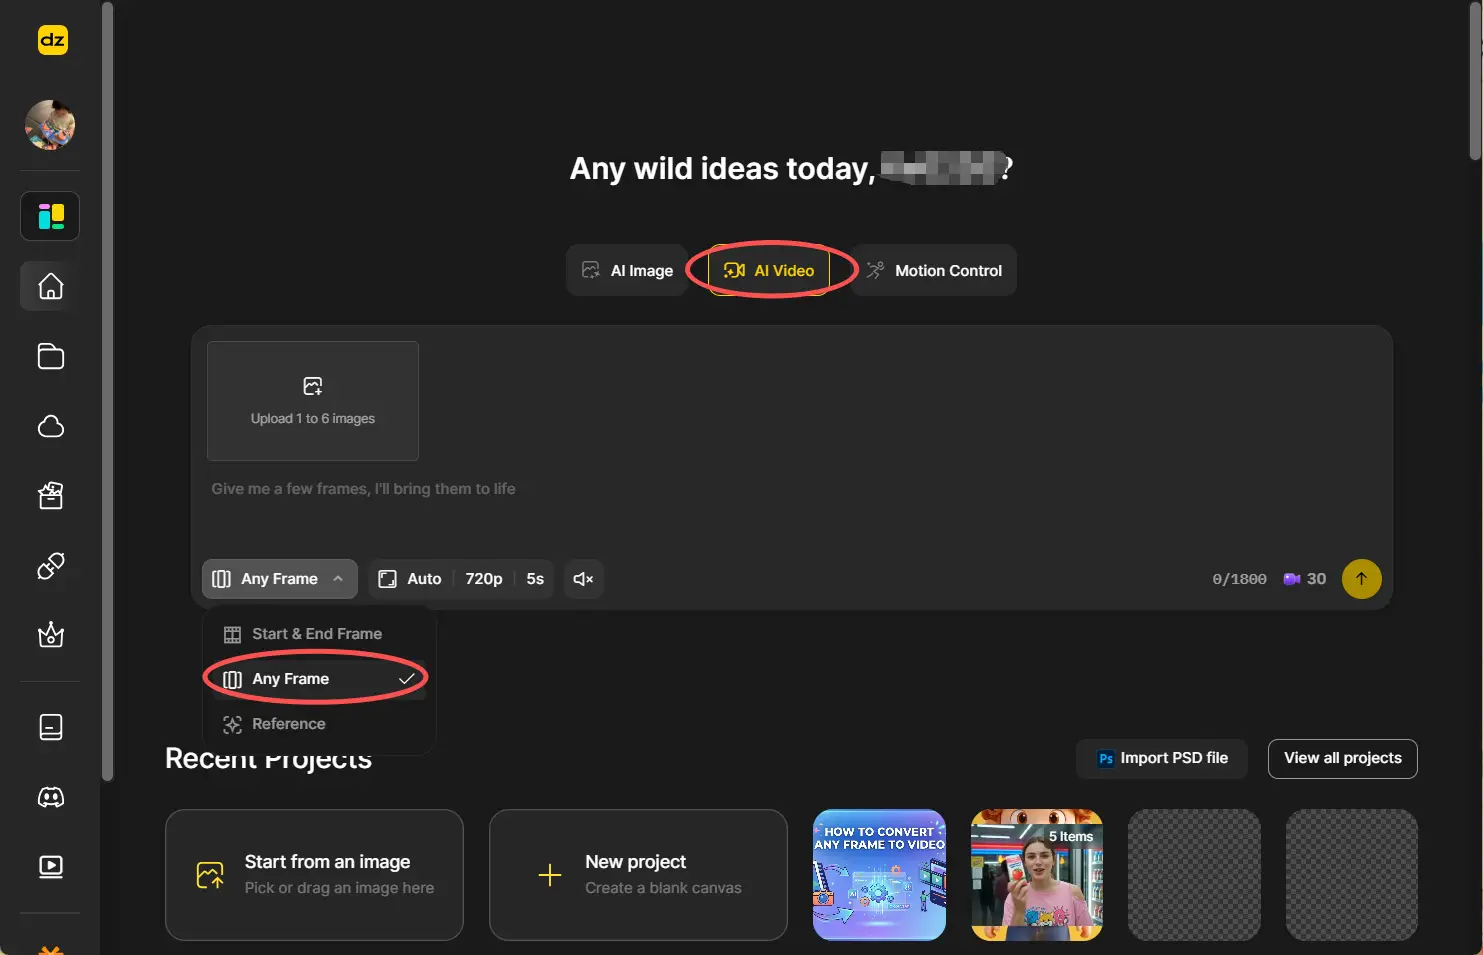
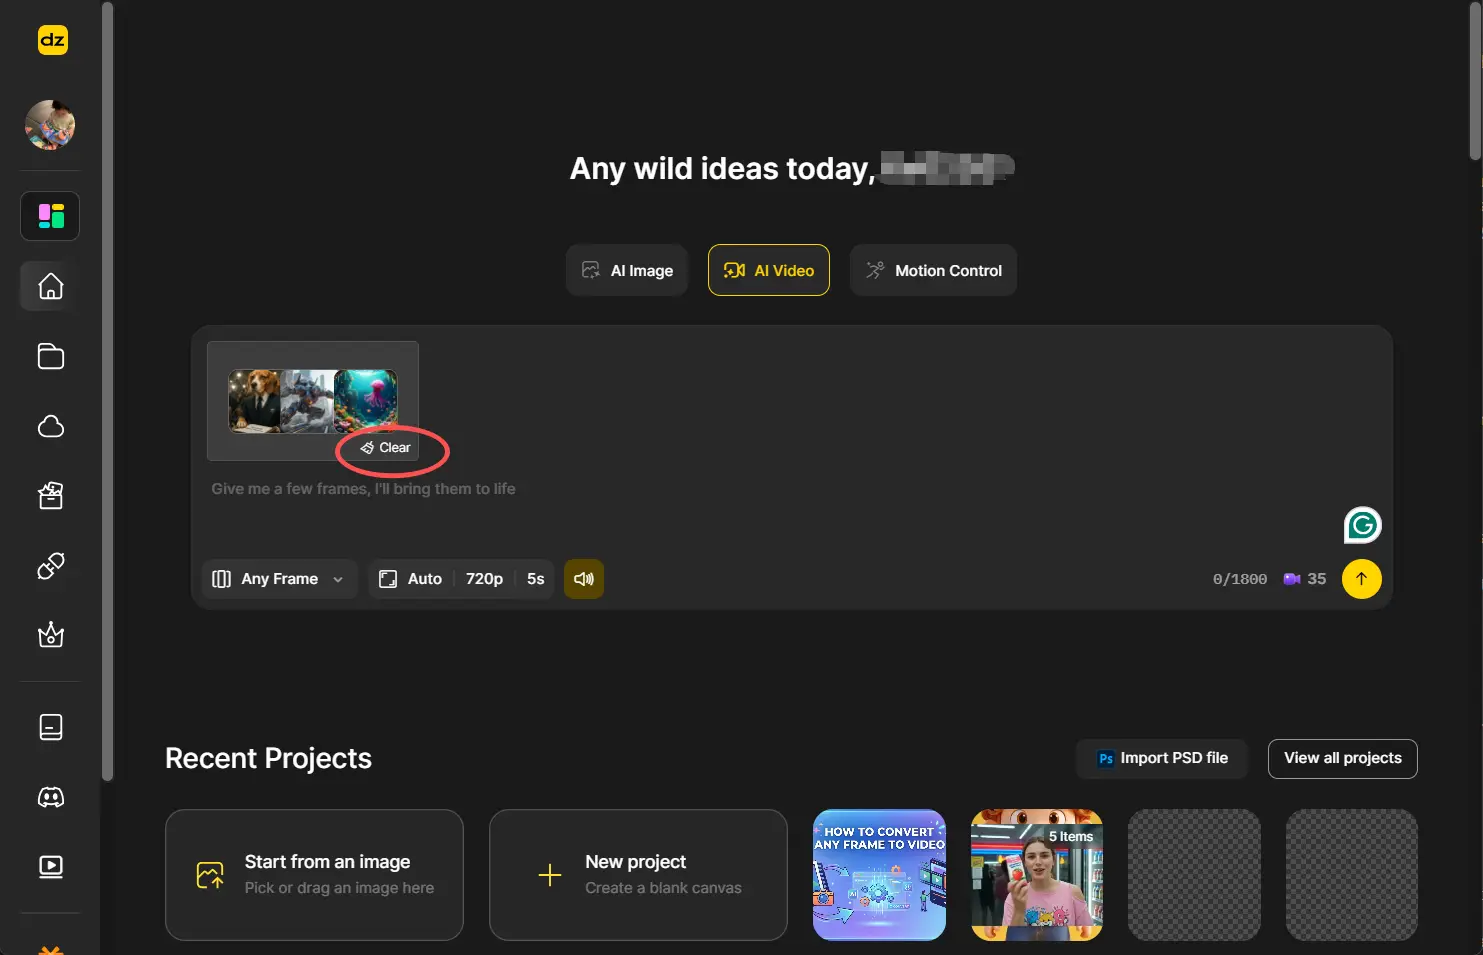
Step 1: Open AI Video and Select Any Frame Mode
Head to the AI Video section in Dzine and choose the Any Frame option. Next, choose the desired resolution, duration, and sounds.
Step 2: Upload Your Images
Click the image upload area, and a Pick Images panel will appear. You can either drag and drop images from your computer, or pull images directly from your Dzine canvas if you’ve already been working on visuals. You can add up to 6 images per video.
Step 3: Arrange Your Frames on the Timeline
After uploading, you’ll enter the Any Frames editor - a timeline-based workspace where you can drag each image to the time position where you want it to appear in the video. You can hover over any image to see a larger preview, click arrows to swap adjacent images, or drag and drop to rearrange freely. This step is where your story gets structured.
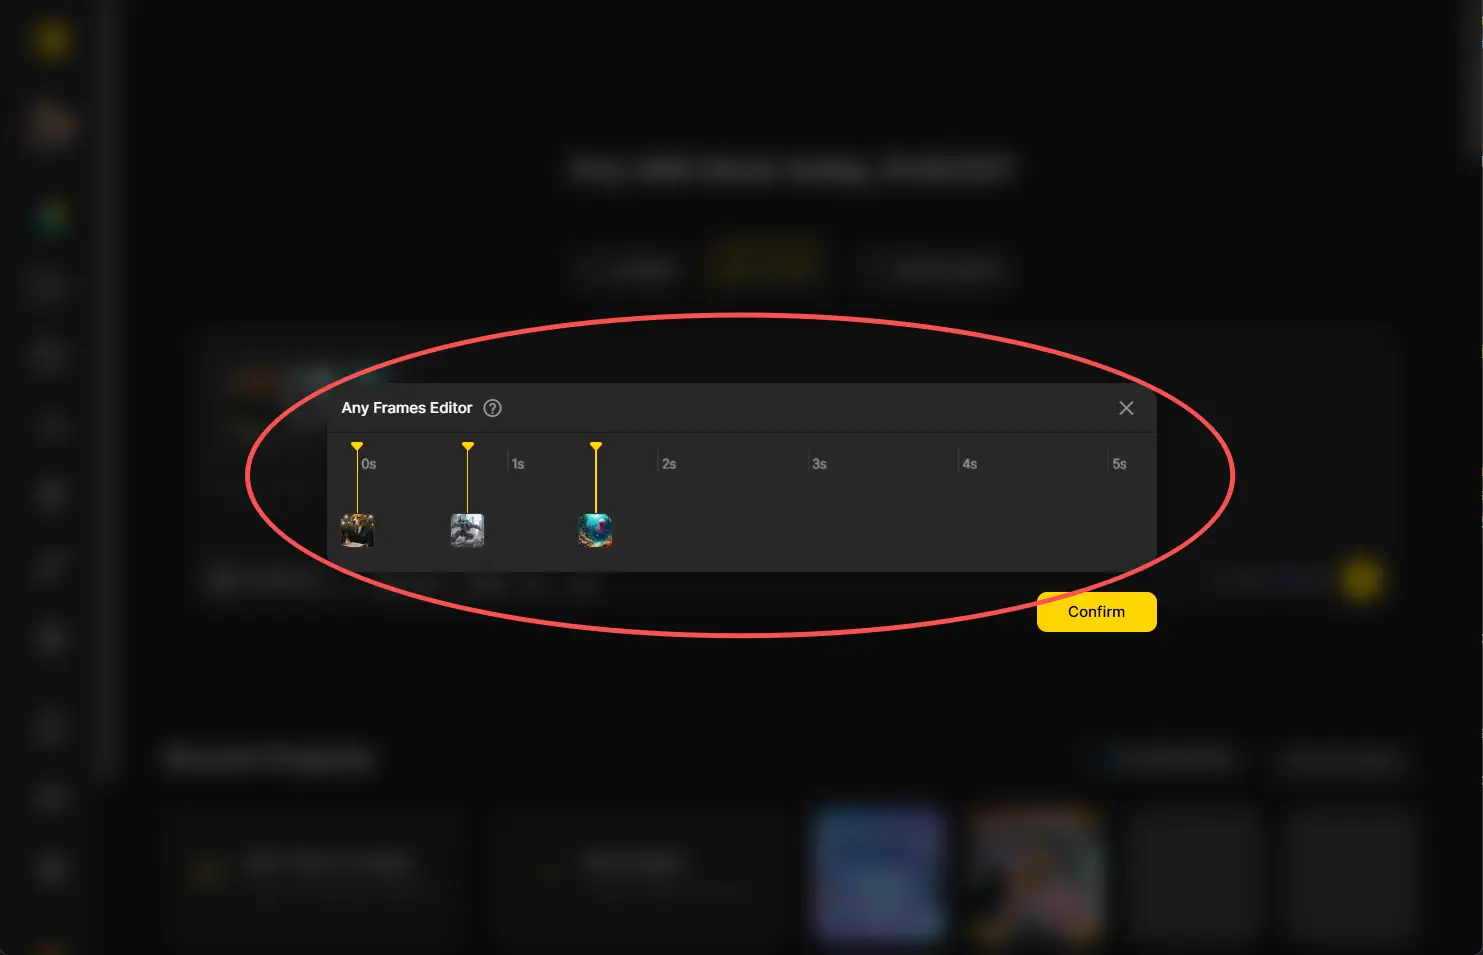
Step 4: Confirm Your Frame Layout
Once you’re happy with the arrangement, click Confirm. Your keyframe sequence is locked in and ready for generation.
Step 5: Add a Prompt (Optional) and Generate
Back on the main screen, you can add a text prompt to further guide the video’s style, mood, camera movement, or atmosphere. Or you can skip the prompt entirely and let the frame arrangement do the heavy lifting. Click Generate, and Dzine’s model will produce a video where your uploaded images appear at the right moments, connected by smooth AI-generated transitions.
Step 6: Edit or Clear if Needed
Not happy with the layout? Click the upload area again to re-enter the editor and make changes before generating. Or use the Clear button to remove all images and start fresh. That’s all it takes to convert any frame to video online free of complicated timelines or manual editing software.
Why This Feature Actually Matters
The core value of Any Frame to Video isn’t just convenience - it’s about shifting creative control back to the user.
1. From unpredictable to intentional.
Standard text-to-video generation is powerful but imprecise. You describe what you want, and the model interprets it. Any Frame to Video flips this: you show the model what you want. By anchoring the video to real images at specific time points, you dramatically reduce the gap between what you imagined and what gets generated.
2. You don’t need a complete storyboard.
One of the biggest creative roadblocks in video production is figuring out how a scene starts and ends before you even begin. Many creators find it hard to pre-visualize a full sequence. With Any Frame to Video, you can work from the middle outward. Got one compelling image that captures a mood or a moment? That’s enough to start. The model will build around it. This lowers the creative barrier and cuts down on the trial-and-error cycle that eats so much production time.
3. Prompts and frames work together.
The feature doesn’t force you to choose between visual references and text descriptions. You can use both. A few keyframes lock in the visual anchors; a prompt adds stylistic direction. This combination gives you both stability (the frames) and flexibility (the text), which is a rare balance in AI video tools.
4. The editing logic is intuitive.
Placing an image on a timeline is something most people understand immediately. There are no abstract parameters to figure out. If you’ve ever dragged a file into a folder, you can use this editor. That kind of accessibility matters when you’re trying to stay in a creative flow rather than fight the tool.
Real Use Cases Worth Trying
Here are a few scenarios where learning how to convert any frame to video online pays off immediately:
-
Brand storytelling: Upload product shots at different stages of a campaign, place them along the timeline, and generate a smooth narrative video without any video editing software.
-
Character journeys: Have a series of AI-generated character illustrations? Line them up on the timeline to create a short animated story where the character visibly evolves or moves through scenes.
-
Before-and-after content: Place a “before” image early in the timeline and an “after” image near the end. Let the AI generate the transformation in between - ideal for beauty, fitness, renovation, or design content.
-
Mood sequences: Create emotional arcs by arranging images from calm to tense to resolved, and let the transitions carry the viewer through a feeling rather than a plot.
-
Educational walkthroughs: Arrange diagrams or illustrated steps across the timeline to produce an explainer-style video that walks viewers through a process visually.
Each of these becomes achievable without a production team, expensive software, or hours of manual editing — just a few images, a clear sequence, and Dzine’s Any Frame to Video feature.
Final Thoughts
Knowing how to convert any frame to video isn’t just a technical skill - it’s a creative strategy. When you can anchor your video to specific images at specific moments, you stop generating content and start directing it. The difference in output quality and creative satisfaction is real.
Dzine’s Any Frame to Video brings this level of control to a surprisingly simple interface. Whether you’re a solo creator, a marketer, or someone experimenting with AI video for the first time, the workflow is designed to get you from idea to finished video with far less frustration. Upload your images, set your sequence, and let the model handle the transitions. The story is yours - Dzine just helps you tell it.
Ready to try it? Head to Dzine’s AI Video section and start with Any Frame mode today.
by Daisy
Exploring how AI transforms marketing, I help businesses unlock growth and future-proof their presence.